Under the hood
From RAW to corona: what Easy Corona computes
Every step of the app explained without code: what is measured, what is computed and why. All the images come from the same eclipse (12 August 2026, 600 mm) and were computed with the app's own functions.
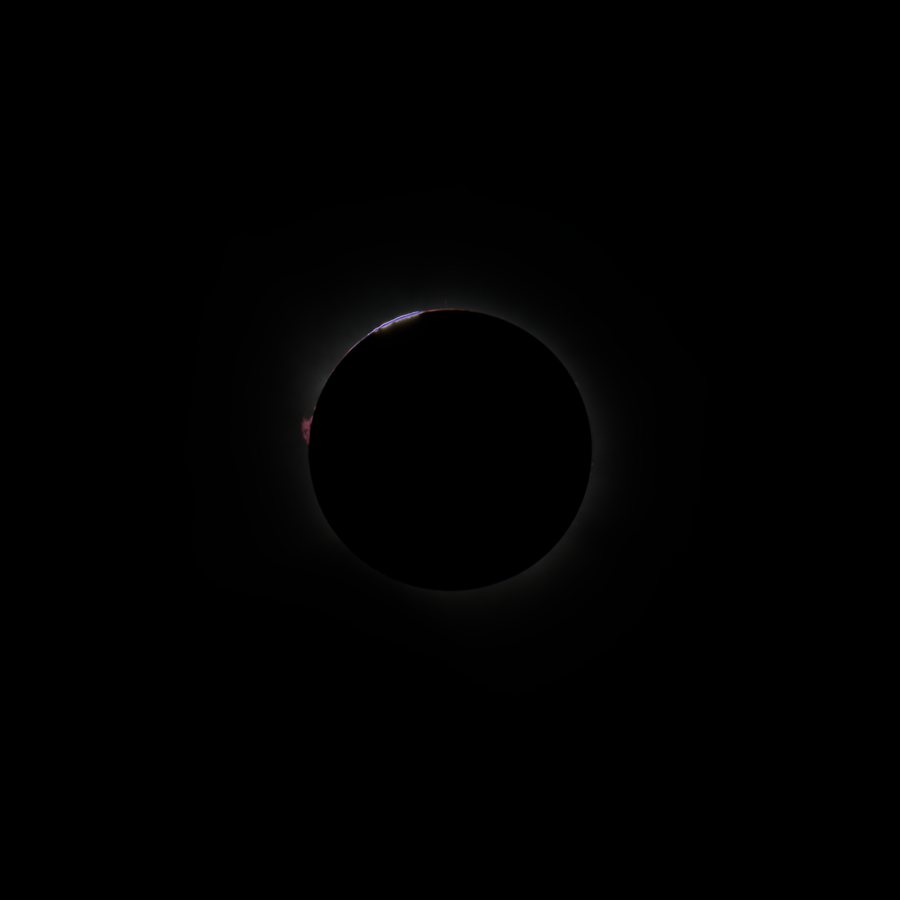
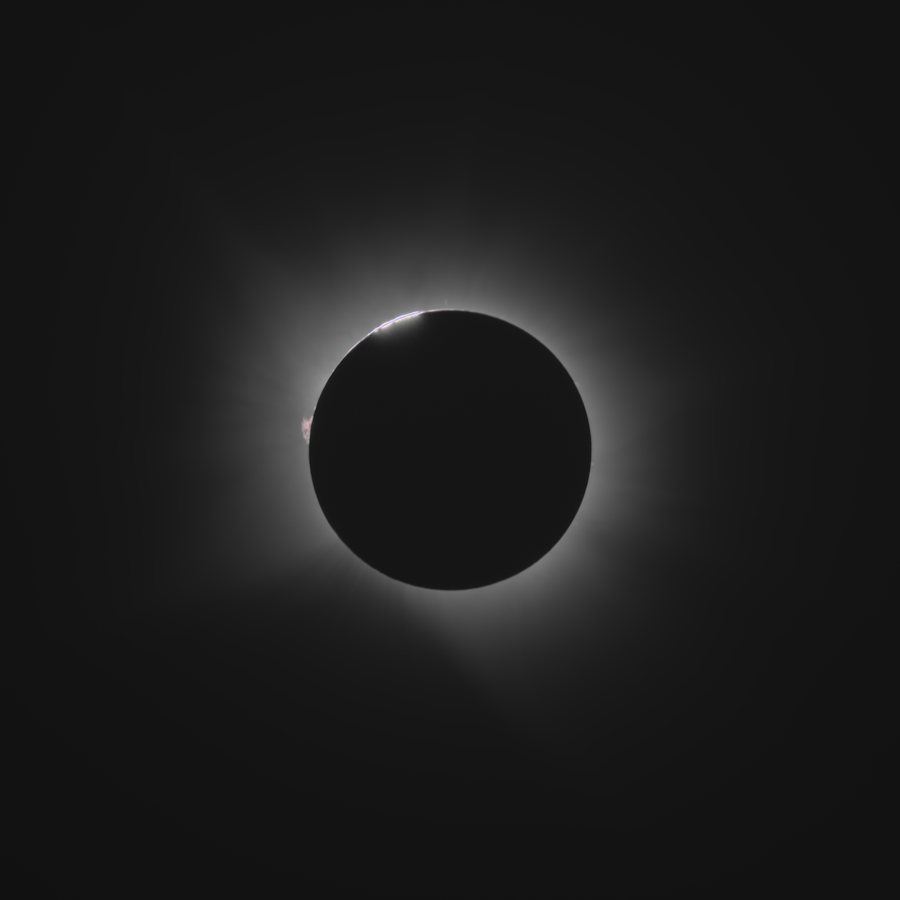
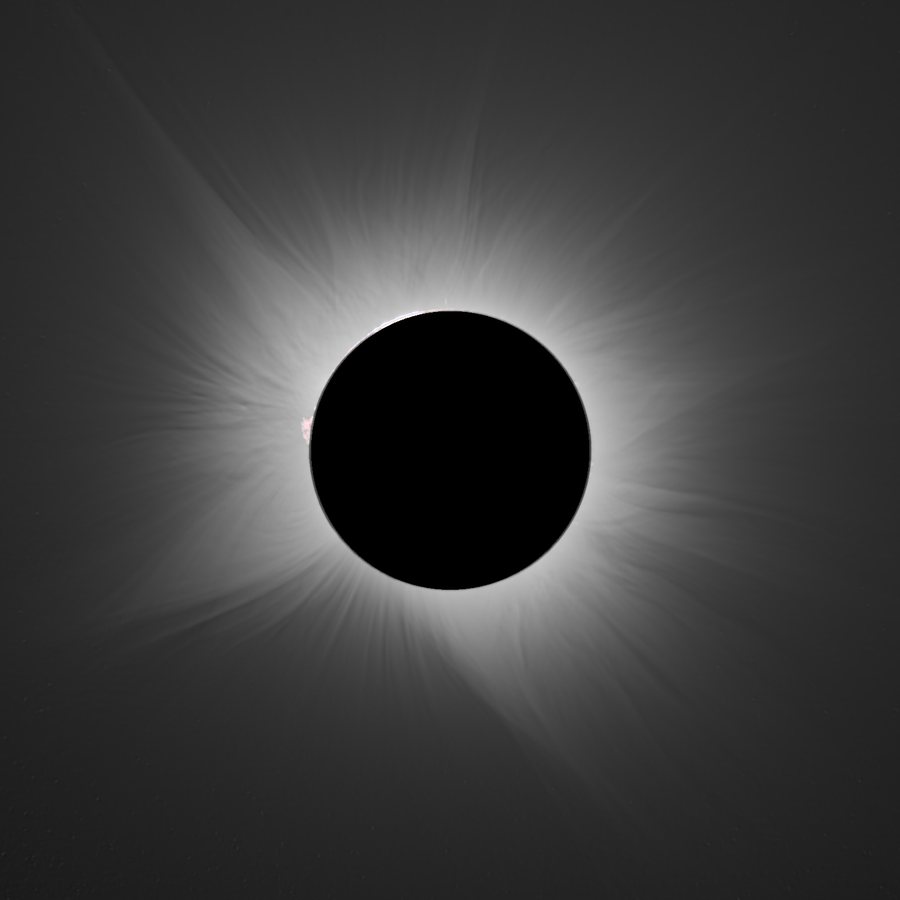
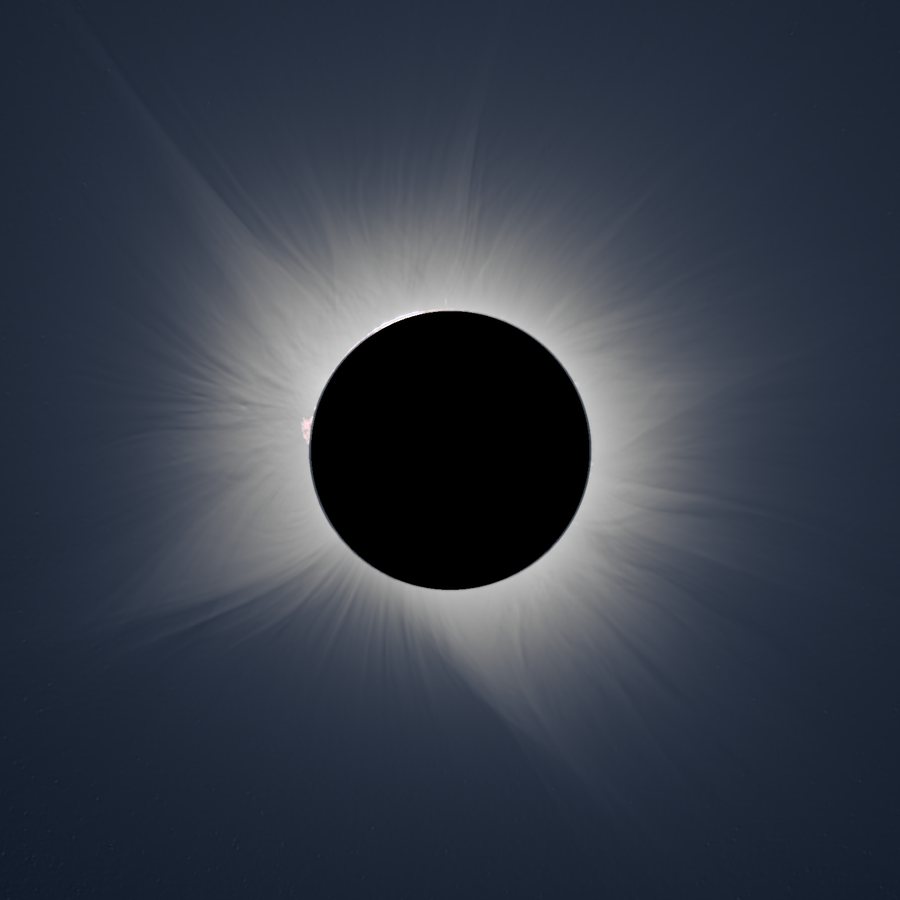
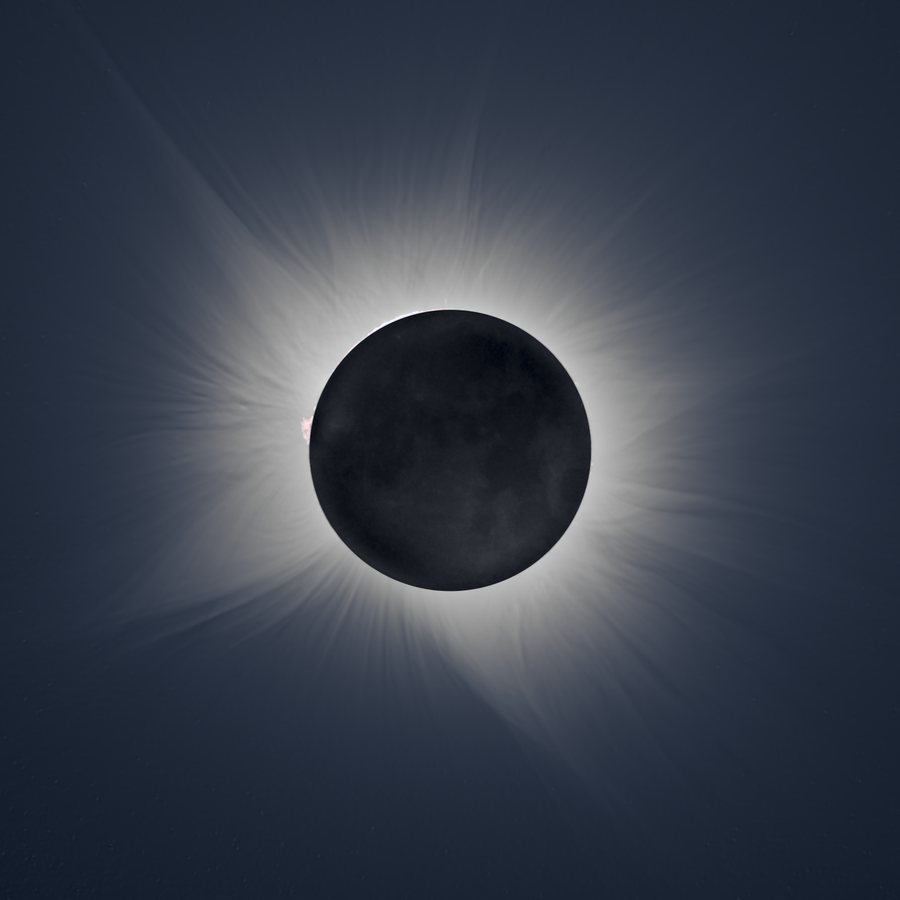
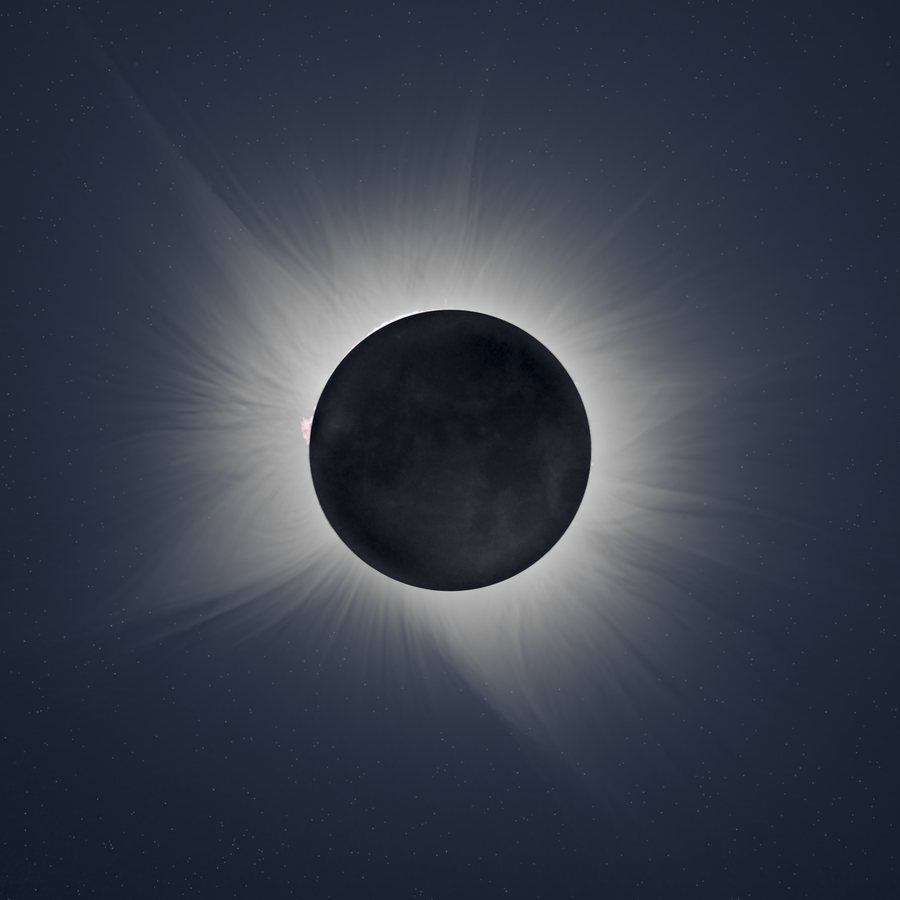
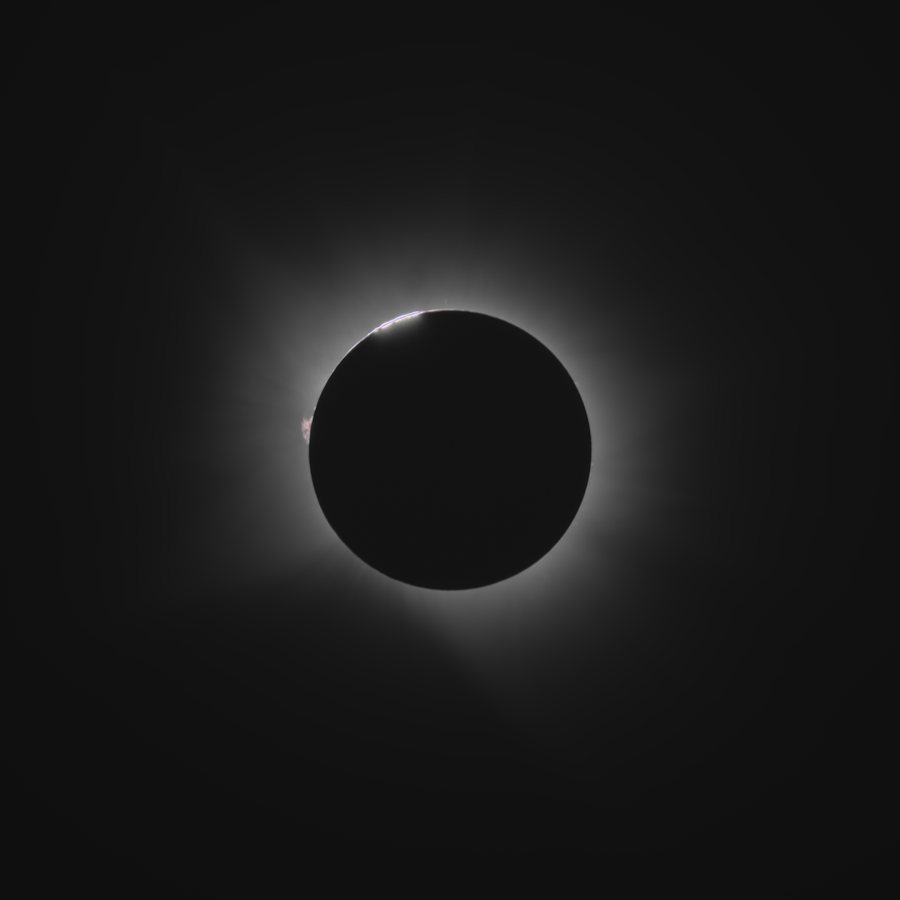
The final result. Press 1 to see the HDR as it comes out of the stacking and follow it stage by stage.
1From RAW to HDR
2Enhancing the corona
3The final result
Part 1
From RAW to HDR
Combining dozens of photos with different exposures into a single 32-bit image, without losing sharpness and with a single Moon.
1.1
The problem: a brightness that drops almost a thousandfold
The corona is very bright next to the Moon and fades quickly further out. The graph is the brightness measured, ring by ring, in the HDR used on this page: from 1.04 to 2 lunar radii it drops about 60 times, and beyond 2.5 radii it blends into the brightness of the totality sky itself. At 3 radii it is only 13 % brighter than the sky at 4 radii.
Once the sky is subtracted, between the edge of the Moon and 3 radii the corona loses about 900 times its brightness, and the prominences and the edge of the Moon are brighter still. No single photo captures all of it with little noise: for the outer corona to have a clean signal you have to expose so long that the edge of the Moon and the prominences burn out, and with the exposure that keeps the prominences the outer corona is lost in the noise.
And even once they are combined into an HDR, a screen only shows about 8 stops. That is why there are two different jobs: gathering the light without losing anything (part 1) and compressing that range so it can be seen, bringing out the detail (part 2).
1.2
Reading the RAW files: the light as it reached the sensor
Each RAW file (Canon, Nikon, Sony, Fujifilm, Panasonic, Olympus, Pentax, DNG) is developed linearly: no tone curve, no white balance, no auto brightness, and in 16 bits. A pixel that received twice the light has twice the value. That is what makes it possible to add up photos with different exposures.
From each photo the app reads the shutter speed, ISO, aperture and focal length. With them, the photos are grouped by exposure and sorted by the light each one gathers:
light ∝ time × ISO ÷ f-number²
Dark, Bias (Offset) and Flat subfolders are recognized as calibration; «Chromosphere» and «Earthshine», as photos for those layers. Repeated photos, or photos with the same name, are detected before starting.
1.3
Calibration: darks, bias and flats
Optional, and done on the sensor data, before developing:
- Dark (lens cap on, same ISO and same exposure): subtracted. Removes hot pixels, dark current and the sensor's fixed pattern.
- Bias (shortest time, same ISO): subtracted when there is no dark for that exposure, and it lets a dark from another exposure be scaled (dark current grows with time), only between ¼ and 4 times.
- Flat (same aperture and focus, even light): divided. Removes vignetting and dust spots.
Each «master» is the mean of its photos, discarding, pixel by pixel, whatever is more than 3 deviations from the median (cosmic rays, odd pixels).
calibrated = (photo − dark) ÷ (normalized flat)
Measured with real photos: a 1/1000 s frame does not work as a dark for a 1/4 s one; the sensor pattern is not alike. That is why the app only uses darks with the same ISO and the same exposure.
1.4
Finding the Moon
The Moon is the reference for almost everything that follows (aligning, stacking, the radial filters), so the app looks for it in every photo, even wide-angle shots, photos with trees in them, or with the Moon burned out.
- On a copy of about 900 pixels, the Hough transform proposes circles of every radius, with three different tone curves (square root, logarithm and a gentler one) so it works on both short and long exposures.
- Each candidate is scored by the part of its outline where there is a dark → bright step (black Moon inside, corona outside) and by how the brightness changes outside.
- The winner is refined at full size: the edge is measured at 360 angles and a circle is fitted, with sub-pixel precision.
If a photo has no visible edge (Moon burned out in the long exposures), the common Moon of the others is used, never the saturated blob. And if nothing works, it can be marked by hand on the preview.
1.5
Alignment: on the corona, not on the Moon
During totality the Moon moves in front of the Sun: about 0.5 arcseconds per second, 3 % of its radius every minute. With the 600 mm lens used for these photos that is about 20 pixels per minute. If all the photos were aligned on the Moon, the corona would be blurred; that is why the fine alignment of each group is measured on the corona, which does not move, and never on the Moon (the initial alignment can use either one).
- First, a whole-image alignment by phase correlation (in Fourier space, which gives the shift between two images in one go).
- Then the refinement: each photo is compared with the median of its group in 8 to 16 full-size windows, placed where the corona has detail. Each window gives its shift with sub-pixel precision, and from all of them comes a robust fit of rotation + shift.
- Photos that do not look like the others, or that would need more than 12 pixels or 0.3° of correction, are moved to a «_descartadas» (discarded) folder, never more than a third of them. Afterwards they can be checked one by one with their «Difference» view.
The exposures are then aligned with each other, each one with its already aligned neighbor, from the reference outward. If the windows of a short exposure have little signal, the whole corona area is measured, or 16 small windows next to the edge of the Moon.
1.6
Averaging each exposure, with a single Moon
The photos of one exposure are averaged: the noise drops with the square root of the number of photos (with 9 photos, to a third). That is what makes it possible to stretch the outer corona a lot without the sky filling up with grain.
But since the Moon moved from one photo to the next, a plain average leaves ghosts: the edge of the Moon repeated several times, a blurred ring. Easy Corona averages with a single Moon:
- The Moon of the average is the one in the middle photo of the group.
- Each photo weighs more and more the further it is from its own Moon, so next to each edge only the photo that has it in place counts. No arcs from the other Moons are left.
- A badly detected Moon (more than 0.2 radii away from the others) is left out.
The HDR repeats the idea: its Moon is the one from the exposure with the most light whose edge is not burned out.
1.7
HDR stacking
Each exposure sees part of the corona. Below, the same HDR with the light that four exposures would gather, from the shortest to the longest (simulated by multiplying the HDR and clipping at white, as the sensor does):
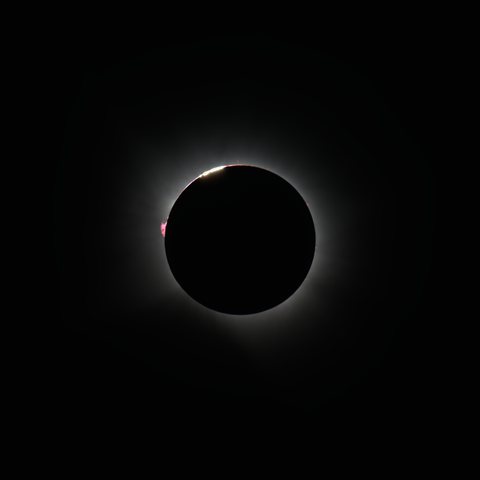
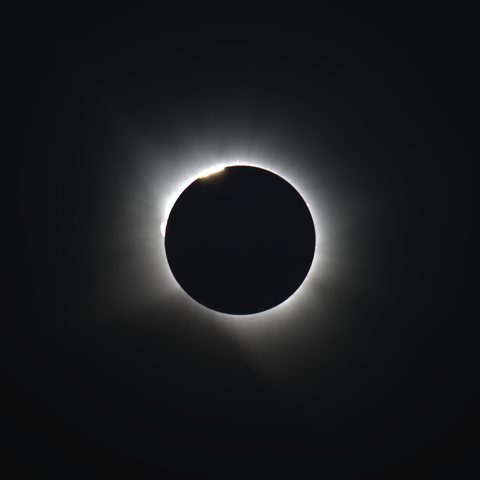
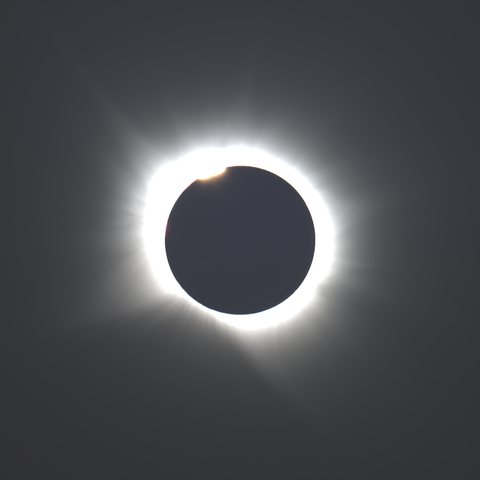
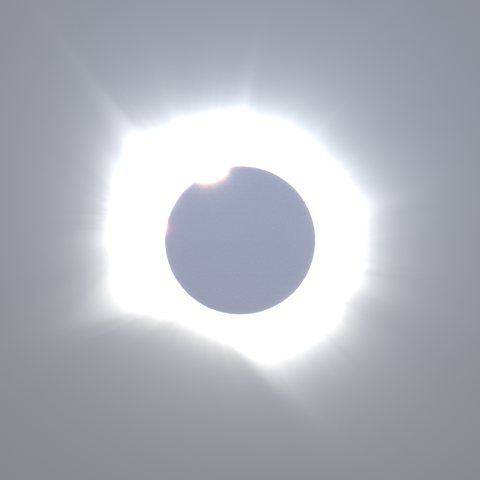
Same scale. Between each pair of exposures a straight line (gain and offset) is fitted using the pixels that are well exposed in both. Each photo is thus brought to the scale of the reference using what the photos themselves measure, not the EXIF shutter speed.
Weights. Every pixel of every exposure counts according to its value: little if it is almost black (just noise), a lot in the middle of the range and not at all if it is clipped (above 99.5 % of that photo's maximum; CR3 files, for example, clip at 0.997, not at 1). The HDR is the weighted mean:
HDR = Σ weight · (photo − offset) ÷ gain ÷ Σ weight
The Moon. Inside and around the Moon, the clipped exposures do not count (they only bring halo) and the others hardly at all: the Moon in the HDR comes from a single exposure, sharp.
Crop. At the end the image is cropped to the rectangle covered by all the aligned exposures: edges that only some photos reach would have different noise and brightness. The result is saved as 32-bit floating point.
1.8
Two focal lengths in one image beta
With photos from two lenses (for example 600 and 300 mm), the app makes one HDR per focal length and merges them: the detail of the long one within the field of the short one.
- Placement: the initial scale comes from the size of the Moon in exposures with the same light (a burned edge makes the Moon look smaller), and it is refined with an affine correlation registration (ECC) over the whole corona, leaving out what is clipped.
- Brightness: the short HDR is matched to the long one as a gain plus a plane, measured on smoothed copies of both (otherwise the noise biases the gain and leaves a step). Along the way, the vignetting of the long one is corrected.
- Inside the long frame the short one also contributes, by scale bands and rings, each one weighted by the noise of each HDR. Outside it, only the short one, with a smooth transition.
- Afterwards, the noise and the black level for the filters are measured only in the long frame; otherwise the enlarged part (almost noise-free) and the landscape would mislead the filters.
Part 2
Enhancing the corona
Compressing a range of thousands to one into what fits on a screen, and making the fine structure visible: rays, plumes, loops and filaments.
2.1
Color: neutral or the camera's original
The HDR comes out with the sensor's colors, without white balance (greenish). There are two ways to give it color:
- White corona (neutral). For each channel the background (1st percentile) and the corona (99th percentile) are measured; the background is subtracted and each channel is divided so that the corona comes out white. The figures are measured on the full image, one in every 10 rows and columns.
- Original color. With a RAW file from the session, the app takes your camera's color matrix and the white balance you shot with, and converts the HDR from the sensor's colors to sRGB, as the camera would develop it. The sky is lifted only as much as needed (the «floor» is measured in the dark half of the image).
Keep saturation. When stretching, a faint color gets much brighter and would wash out. With this option the chroma is recomputed so the color is the same with the new lightness (going through XYZ): no more saturated, no less.
2.2
Subtracting the sky gradient
During totality the sky is not uniform: it is brighter toward the horizon and, around the Sun, scattered light falls off gradually. Once stretched, that gradient turns into one side of the photo being brighter than the other.
On a 700-pixel copy, and only in the sky furthest from the Sun, the app fits a model with two parts: a plane (the gradient) and a radial falloff around the Moon (the outer corona, which is also there). The fit is repeated discarding what stands out (stars, landscape) and only the plane is subtracted: the radial part is there so the corona is not mistaken for a gradient. The subtraction is done in linear space, before stretching; afterwards, it would distort the corona.
2.3
Stretching: a logarithmic curve on lightness
The stretch is applied to the lightness L* of the CIELAB color space (the one the eye sees), without touching the hue: the color is adjusted separately so it does not change. The curve is logarithmic:
L*′ = 100 · ln(1 + a · L) ÷ ln(1 + a)L = HDR lightness (0-1); a = how much to stretch: 15,000 by default, 20,000-30,000 in the styles with more detail
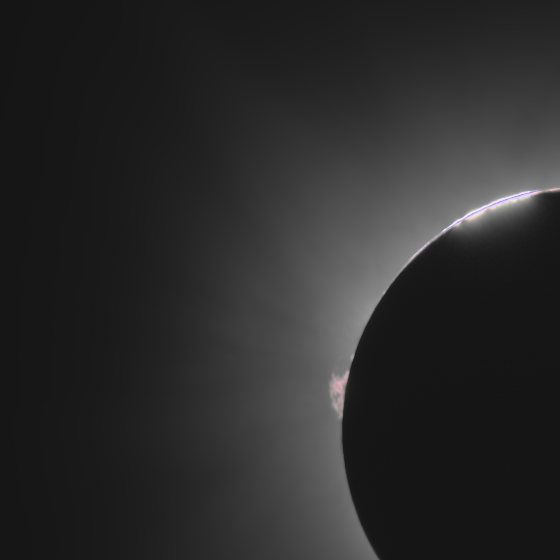
With a large a, each decade of brightness takes a similar share of the tones: the inner and the outer corona fit at the same time. «Outer corona» in simple mode is this a: more = more distant corona, and more noise in the sky.
Optionally, a black point: the sky percentile that becomes pure black (measured without the Moon's disk).
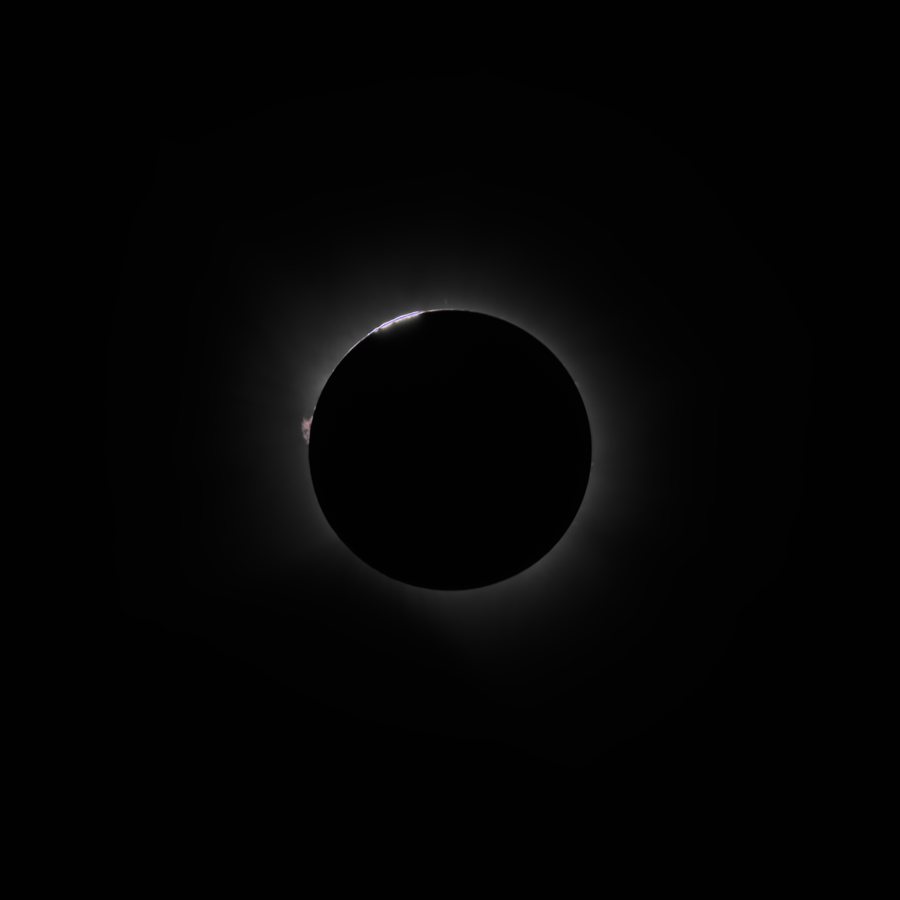
 a = 500a = 15,000
Move the line. With a gentle stretch only the inner corona shows; with the default one, the corona reaches the edges. Neither of them has any detail yet: the corona is a soft halo because the brightness falls so fast that the structure (variations of a few percent) stays hidden. That is what the next filters bring out.
2.4
Noise: the distant sky and the color
Detail filters enhance everything small, grain included. Before them:
- Non-local means (NLM) on lightness, only far from the Sun: it fades in from 1.5 to 3 radii, so the inner corona is untouched. Each pixel is replaced by the mean of the pixels whose neighborhood (7 × 7 patches within a 21 × 21 area) resembles its own: the grain goes away and the rays, which resemble themselves along their length, stay. The strength is 0.6 times the noise measured in the distant sky (more leaves «worms»).
- Color noise: the color channels (a*, b*) are smoothed from 1.2 radii outward. The eye sees detail in lightness, so the corona does not lose sharpness and the colored speckles disappear.
Non-local means: Buades, Coll and Morel, 2005.
2.5
Fine detail: MGN, WOW and NAFE
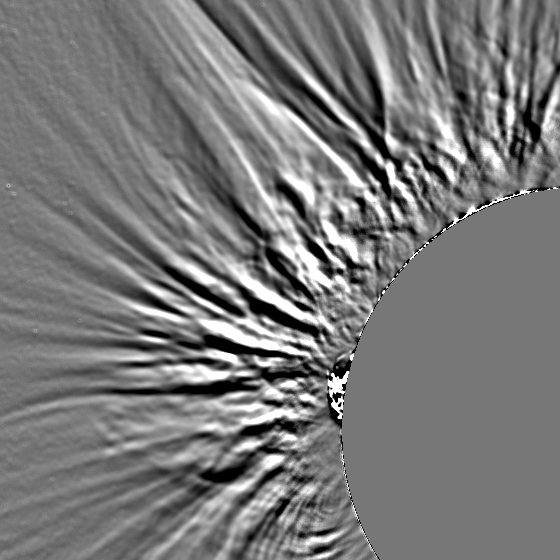
All three are published methods for images of the corona, and they solve the same problem: the contrast of the structure is small and changes enormously from the inside out, so it has to be equalized locally. Each one gives a detail map D between −1 and +1 (below, in gray: white = brighter than its surroundings, black = darker), which is then added to the image.
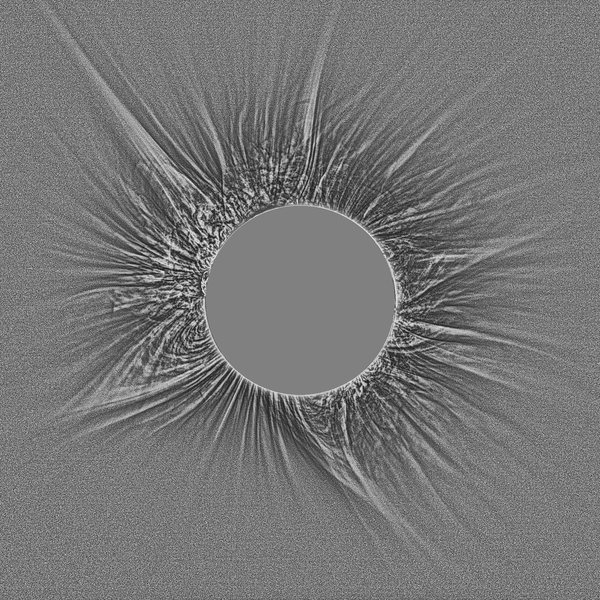
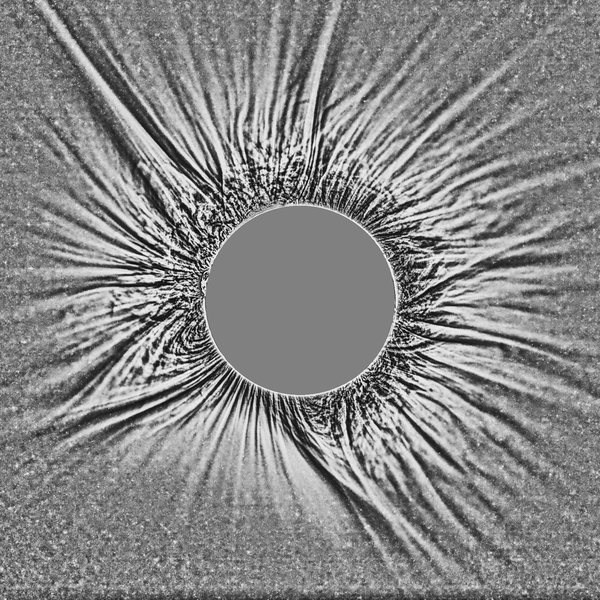
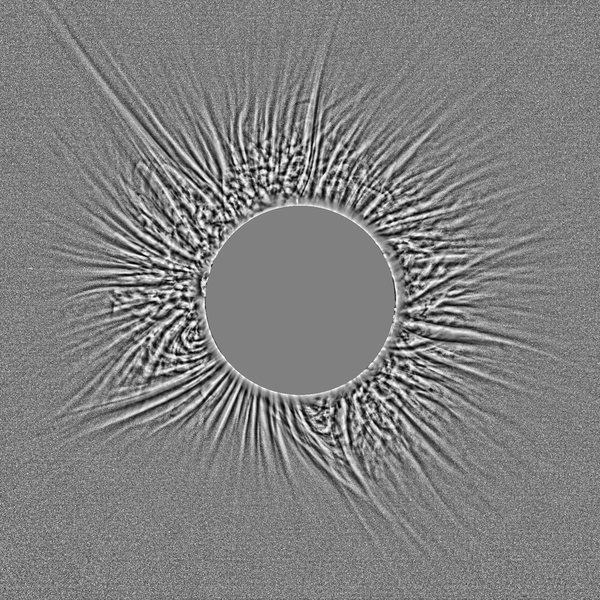
MGN · multi-scale Gaussian normalization
At 6 scales (from 1 to 32 pixels with a 620-pixel Moon, doubling each time), each pixel has the mean of its surroundings subtracted and is divided by the deviation of its surroundings. A detail is thus worth the same next to the Sun as far away: what counts is how much it departs from what surrounds it. Each scale is compressed with an arctangent and they are averaged.
D = mean over the scales of arctan(k · (L − mean) ÷ deviation)
The app's improvement: in a smooth sky the deviation is only noise, and the MGN would raise it to the level of the rays. It gets a floor, the standard deviation of the distant sky (beyond 3.5 radii): where there is only noise it is no longer amplified, and where there is structure hardly anything changes.
Morgan and Druckmüller, 2014.
WOW · wavelet optimized whitening
The image is split into scale bands (differences between successive blurs: each band carries only the detail of its size) and each band is divided by its local power. All scales and all areas end up with the same power: the spectrum is «whitened». Then they are added up and compressed.
The app's improvement: each coefficient is attenuated when its power gets close to the noise of that band (the larger of the pixel noise and what the band measures in the distant sky), as the paper proposes. Without it, the sky comes out as «detailed» as the corona.
Auchère, Soubrié, Pelouze and Buchlin, 2023.
NAFE · noise adaptive fuzzy equalization
A local histogram equalization: each pixel takes the value of the fraction of its surroundings (4 % of the lunar radius) that is darker than it. The comparison is «fuzzy»: two values that differ by less than the noise count as half equal, so the smooth sky stays gray and the real structure does not.
Druckmüller, 2013.
How it is added. The stretched image first goes through a tone curve (power 0.6, which lifts the midtones without burning the edge of the Moon) and then the detail multiplies:
result = base · (1 + amount · D)
The color is scaled by how much each pixel gets brighter, so the faint corona does not wash out. «Fine detail» in simple mode moves the mix and the amount. The app's styles use only the curve (amount 0) and get the detail from the passes: WOW added to the passes can give «scales» at full size.
2.6
Enhancement passes: unsharp masking in polar coordinates
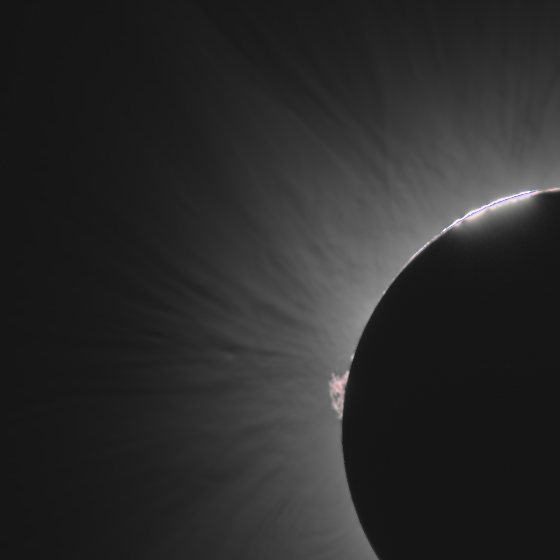
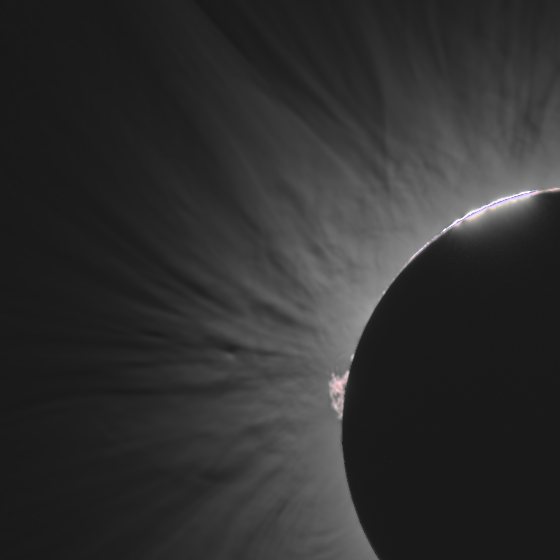
The corona is made of radial structures: rays coming out of the Sun. A normal sharpening blurs in a circle and also enhances the grain. The passes blur with a spot stretched along the circle around the Sun, with one radius for the radial direction (σr) and another for the tangential one (σt):
result = image + intensity · (image − polar blur)
With a very small σr and a large σt, what is subtracted is the mean of each ring over an arc: what remains is exactly what changes from one angle to the next, the rays. The styles use tangential-only passes (σr 0.35 px, σt 8, 20 and 40 px at full size).
- Next to the Moon: before blurring, the disk pixels near the edge are filled in with the adjacent corona; otherwise the black disk would enter the blur and leave a dark ring.
- Far from the Sun: in the styles, the image going into the passes is smoothed (4 px) from 1 to 1.5 radii outward, so the passes mark the rays and not the grain.
- The computation is done only over the band of radii that can affect each pixel: the same result, up to about 37 times faster than the full sum.
 StretchedPasses
2.7
Inner corona: less filtering next to the Moon
Next to the edge of the Moon the corona is so bright and changes so fast that any detail filter tends to burn it or leave dark spots. «Inner corona» is a radial gradient that multiplies what each filter adds (passes, fine detail and radial normalization): little at the edge of the Moon, fully from «Reach» outward.
weight(r) = 1 − protection · (1 − s(r))s = smooth transition from 0 (edge of the Moon) to 1 (the «Reach» radius)
In the fine detail the mean of each ring is also kept, so the brightness of the inner corona does not change: only what departs from it is softened. With protection 0, the filters act as always.
2.8
Radial normalization: NRGF, FNRGF and RHEF
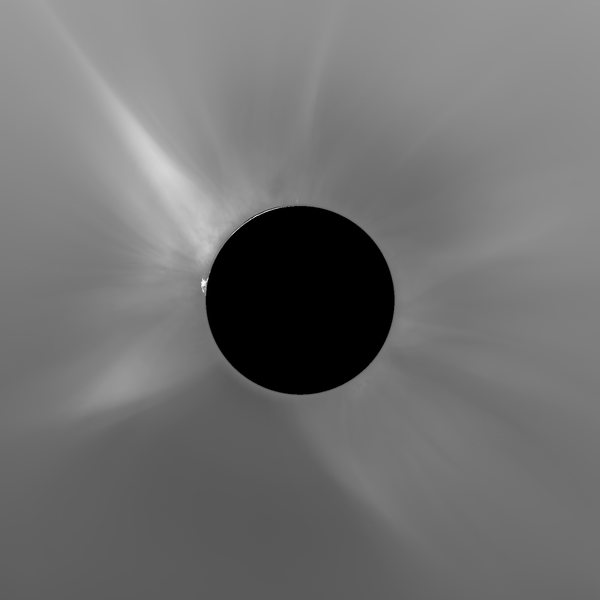
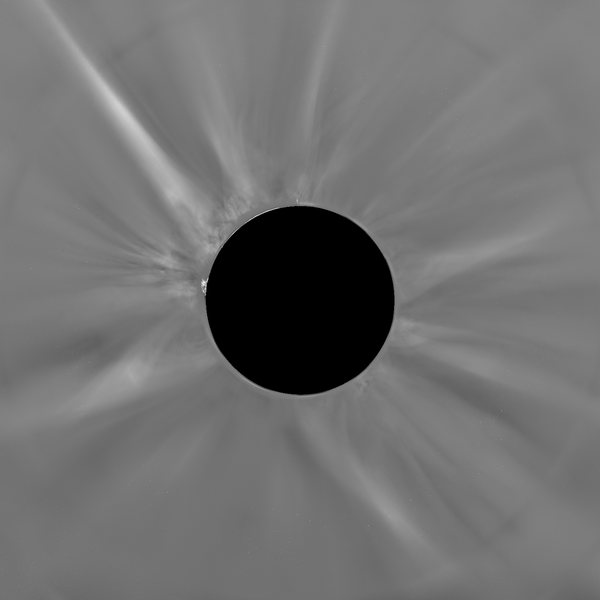
Another way to compress the range, used in scientific images of the corona: each pixel has the mean of its ring around the Sun subtracted and is divided by the deviation of its ring. Every ring uses the whole range of tones, so the inner and outer corona end up with the same contrast and only the structure shows.
z = (L − ring mean) ÷ ring deviation4 px rings with a 620 px Moon; tone: z up to ±6 σ, with the highlights compressed smoothly
- NRGF: one whole ring, one mean and one deviation.
- FNRGF: in addition, the ring is split into 50 sectors and its mean and deviation are approximated with a Fourier series of 10 harmonics in angle (graph). The contrast is thus also equalized from one side of the Sun to the other: a bright plume does not dim the rest of its ring.
- RHEF: each pixel becomes its percentile within its ring, with the fuzzy comparison of NAFE and histograms smoothed between neighboring rings.
Before normalizing, the noise of each ring is cleaned with wavelets (more where the filter amplifies it) and hot pixels are removed. The result is blended with your image at the percentage you choose («Structure» in simple mode; 0 by default).
NRGF: Morgan, Habbal and Woo, 2006 · FNRGF: Druckmüllerová, Morgan and Habbal, 2011 · RHEF: Gilly and Cranmer, 2025.
2.9
Final brightness: measured on the corona
The filters change the brightness, so at the end the image is stretched again with the same logarithmic curve. In automatic mode, the amount is searched for (by bisection) so that the median L* in the ring from 1.3 to 1.5 radii is the one you choose (55-60 by default), with a cap so the sky does not get too bright.
Measuring in that ring, and not with a percentile of the whole image, makes the result independent of the framing and the grain: the same corona comes out with the same brightness whether tightly cropped or with a lot of sky. The reference was measured in that same ring on a professional eclipse photo.
Part 3
The final result
What is added at the end, on top of the already enhanced image: the sky color, the Moon, the earthshine, the chromosphere and the stars. That is why changing them is redone in seconds.
3.1
Sky color
No colorBlue sky
A shadow toning in CIELAB: the dark tones are given the color of the sky during totality (hue 274°, chroma 14, measured on eclipse photos) and it fades toward the light tones, so the corona stays white. The lightness does not change: only the color.
«Blue sky» is the strength (0-200 %) and «Hue» turns it toward violet or turquoise. In the «Original color» styles, the sky already has the camera's color and the toning is set to 0.
3.2
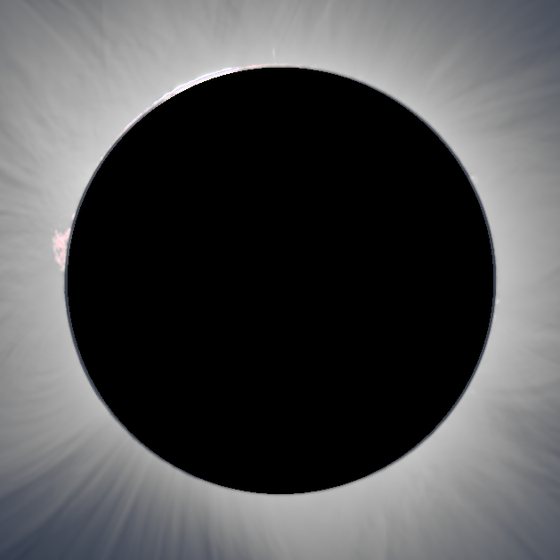
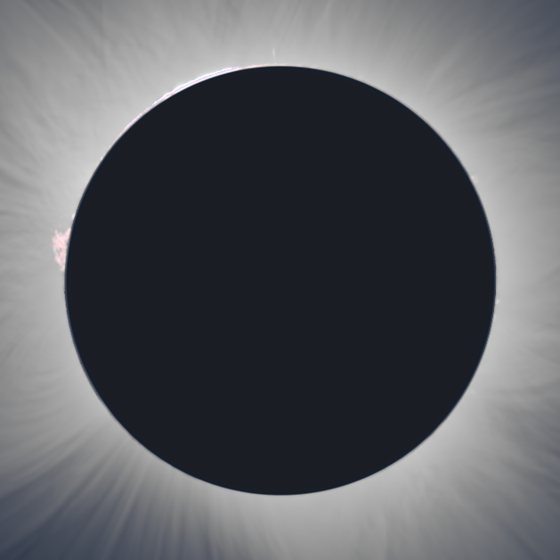
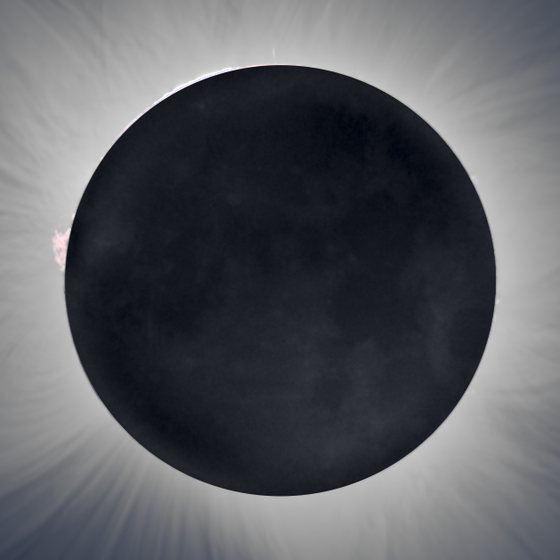
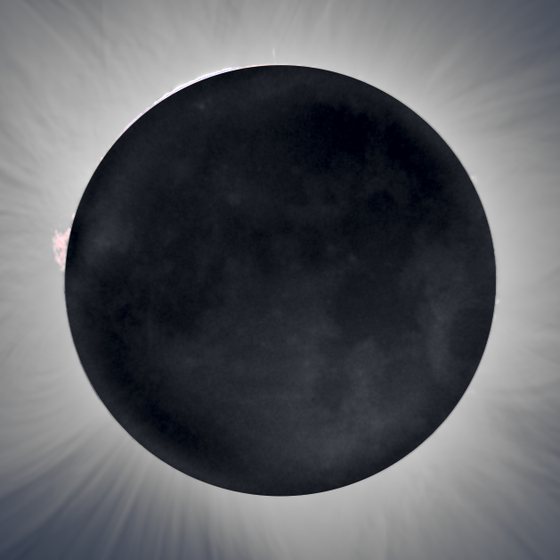
The Moon
The filters leave the disk black (otherwise the passes would find a false circle). At the end it is painted an even gray of your choice (L* 9-13 in the styles), or left «as is» from the enhancement.
3.3
Earthshine: the lunar maria
During totality the Moon is not black: it is lit by the Earth (the «full Earth» seen from the Moon). It is a very faint light that only the long exposures capture, and it sits beneath the brightest corona. Easy Corona makes a separate layer from it:
- The long photos are aligned on the Moon (not on the corona, like everything else): its edge is fitted in each one and the photo is shifted with sub-pixel precision.
- Each one is equalized by the brightness of its disk (whatever the exposure), leaving out what is clipped, and they are averaged.
- The radial profile (the scattered light from the corona, coming in from the edge) and a gradient are removed from the disk. What remains are the maria, darker than the highlands.
- The detail reaches the edge, without a smooth ring, and without the arc of scattered light next to the limb.
From the HDR itself: if there are no separate photos, it is extracted from the HDR's disk, weighting each scale band by its signal-to-noise ratio. It is only accepted if it looks like the real maria: it is compared with a template of the near side of the Moon at every rotation (and mirrored), and it has to stand out from the other rotations. If not, the app says the maria cannot be seen.
3.4
Chromosphere and prominences
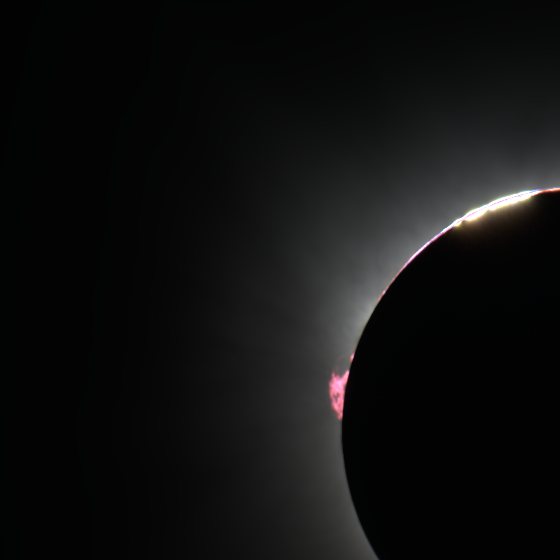
The pink chromosphere and prominences only show in the fastest exposures, at the edge of the Moon. But the Moon moves: in some photos it covers the chromosphere on one side and in others on the other side, and stacked together with the corona they would end up blurred or hidden.
That is why the fast photos are stacked separately, in the Sun's frame, erasing the Moon from each one:
- In each photo the edge of its Moon is fitted and what lies inside does not count. What one photo does not see is supplied by another, in which the Moon was further along.
- They are aligned with shifts only, against the one that gathers the most light; each one weighs according to its light (less noise) and nothing where clipped. If a prominence is clipped in all of them, the clipped channel is rebuilt from the color ratio of its surroundings.
- Atmospheric dispersion separates the colors slightly (blue higher than red): each channel is placed by its own edge of the Moon.
- The layer is placed on the HDR and added at the end: the brightness, from the highest channel with a logarithmic curve (it does not burn out), and the Moon is the one from a single moment, sharp, in front of everything. The band around it, where the HDR's Moon and its ghosts were, is rebuilt with the corona of the result itself, mirrored.
«Exposure» (−1 to +1 EV) only moves what is brighter than the corona.
3.5
Stars beta
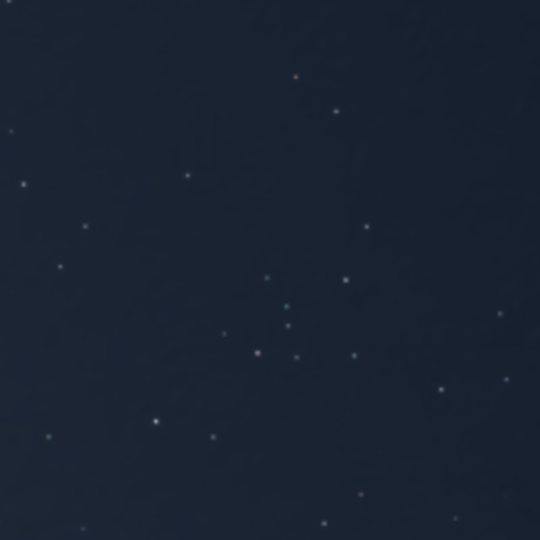
The detail filters treat a star as one more detail: they enhance it and leave a dark ring around it (the negative part of the unsharp mask). On top of that, stacking leaves stray colored hot pixels.
- Finding them in the HDR (linear, before the filters), in strips: a difference of Gaussians brings out what is point-like; the noise is measured in blocks and each candidate is measured on a planar background: flux, width, shape, color and signal-to-noise ratio. Hot pixels (isolated red, green or blue dots) are recognized separately, by their color. Nothing is searched next to the Sun.
- Removing them from the result along with their ring: the gap is filled with an infill that follows the edges of the corona (Navier-Stokes inpainting) plus grain copied from the area next to it, so no smooth patch is left.
- Putting them back clean, the ones you choose from brightest to faintest, with a Moffat profile (that of a real star seen through the atmosphere), their color and the brightness you want. Or none, for a clean sky: «Remove them» also removes the faint and the deformed ones.
The mask (white = star with its halo) can be saved for other programs.
Moffat profile: Moffat, 1969 · Inpainting: Bertalmío, Bertozzi and Sapiro, 2001.


3.6
The files
- 06_final_16bit.tiff: 16 bits with the sRGB curve and its color profile. This is the one to open in Photoshop, Lightroom, Affinity or GIMP.
- 06_final.tiff: the app's own, in 64 bits, with the same sRGB curve.
- 32-bit copies (with «All intermediate files» or «Save the current image»): linear, with a linear sRGB profile. Editing programs assume that a floating-point TIFF is linear; if it carried the sRGB curve, converting it to 16 bits would make it look burned out and blue.
- The HDR, the result and the PNG/JPEG files go to the destination folder; the intermediate files go to a working folder that is deleted if you choose «Final result only».
3.7
The preview is the result
The preview is not an imitation: it calls the same functions as the real process, in the same order, on a reduced copy (from 500 to 2200 pixels), with the radii of every filter scaled with the Moon.
What depends on the noise of each pixel or on the whole image (the neutral color, the black level of the fine detail, the FNRGF normalization, the NAFE noise) is measured on the full image, or on a copy taken pixel by pixel without averaging, which keeps the real noise. Otherwise the reduced copy, with much less noise, would come out darker or with more contrast than the result.
The app's tests compare the preview with the real file, pixel by pixel in L*, a* and b*. The only thing that cannot be seen at a small size is the finest grain: that is what Zoom is for, at full size.